This week I am departing from the travelogue-type posts from our South Africa trip to cover a more technical photographic topic – the quality of light. Light has a number of qualities including direction, colour and intensity but this post concerns the size of the light source which controls the “harshness” or “softness” of the light.
As mentioned in my previous post, we had some periods of direct sunlight at Kirstenbosch before the sun dropped behind the clouds. While editing the images it was clear that those taken in the diffused, soft light were far better than those taken in the direct sunlight and illustrated nicely why I am always happy to see clouds when out photographing birds. Traditionally, the best light for photography is at the ends of the day. Early morning and evening sunlight when the sun is low in the sky creating low intensity warm light is lovely and by having the sun at your back (pointing your shadow to the subject) some great images can be made. Unfortunately direct sunlight can limit shooting to these early and late in the day times and make the bulk of the day frustrating. Despite being able to capture a wider range of brightness values than film could, digital sensors are still unable to record the range that our eyes can appreciate. The result is that we have to deal with blown highlights or blocked up shadows if the light is bright and direct creating bright highlights, dark shadows and a sharp delineation between the two. This is largely a result of the size of the light source. Direct sunlight is essentially a point source producing high contrast lighting. In a studio setting a single direct flash is similar, creating a small intense source of light which creates hard shadows. Light modifiers like soft boxes or diffusion panels can “diffuse” the light but in essence what they are doing is changing a small light source into a larger light source which then creates a softer “wrapping” light. The closer the soft box is to the subject the larger its apparent size becomes and the softer the resultant lighting. Outdoors a large scrim can perform the same function but is impractical for wildlife and birds so we need natures scrim in the form of cloud cover.
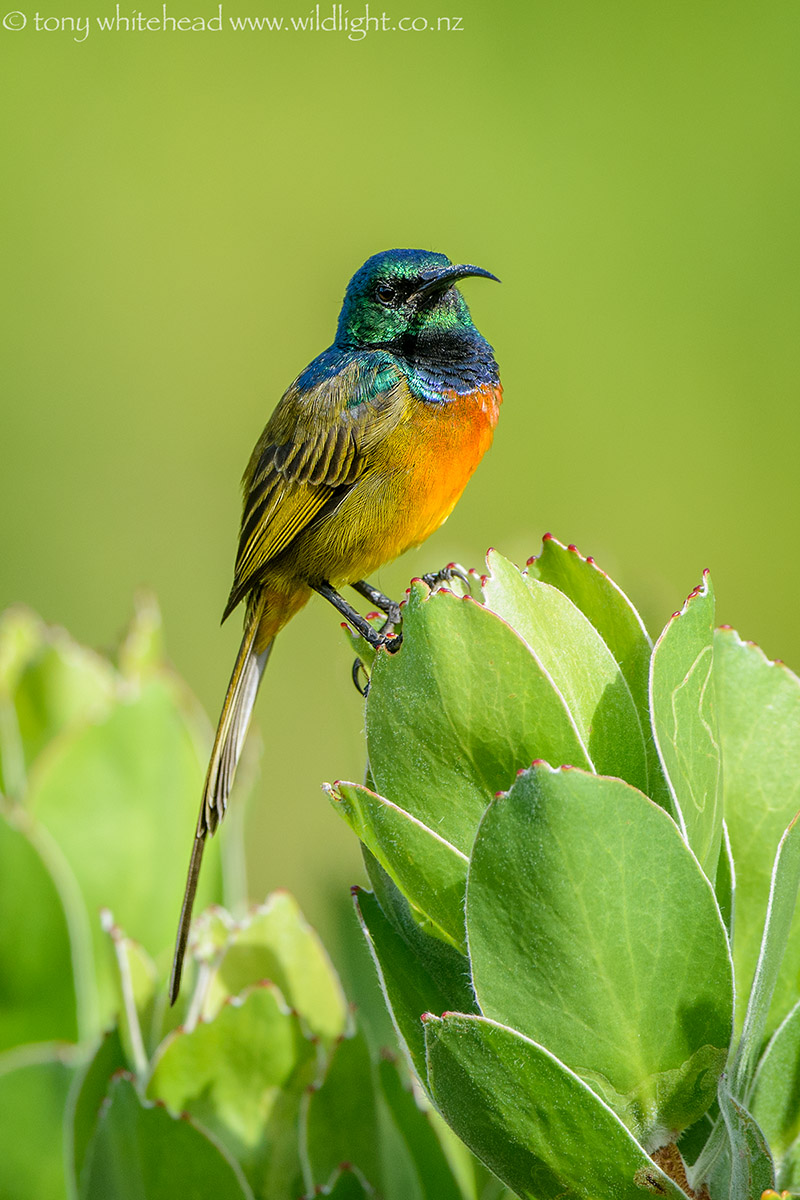
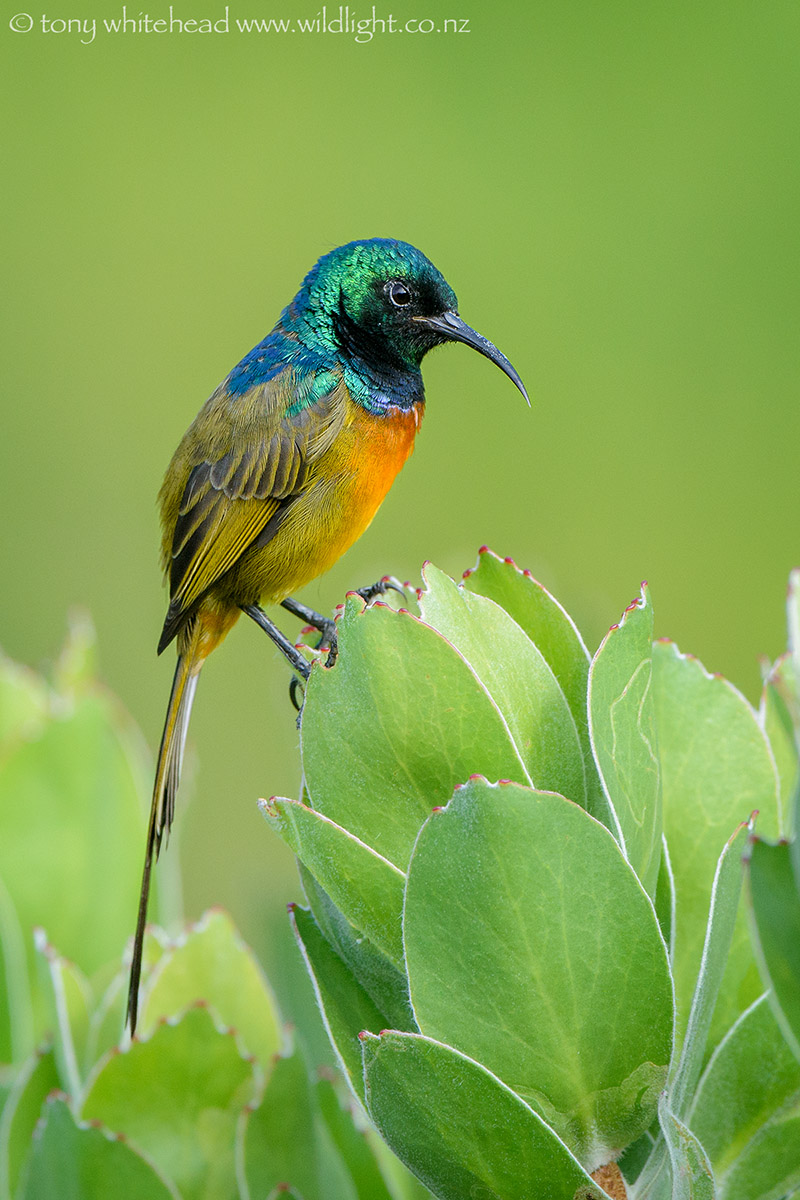
These 2 shots show a bird in direct sunlight and then just after the cloud cover appeared.
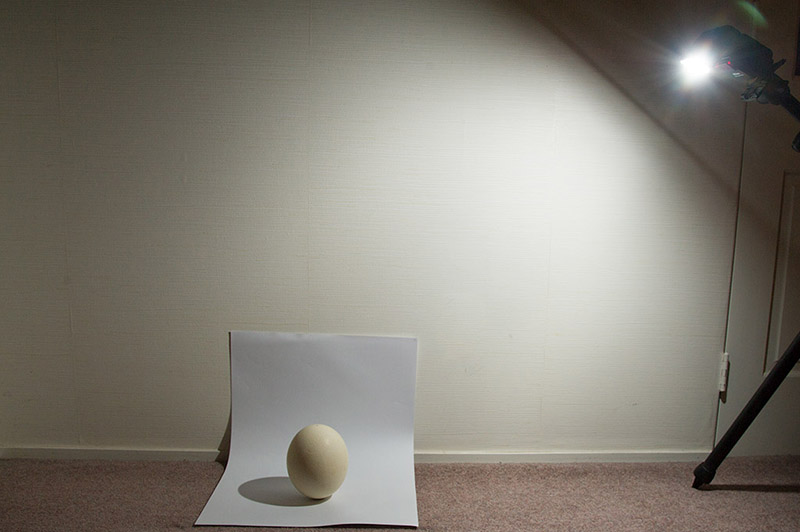
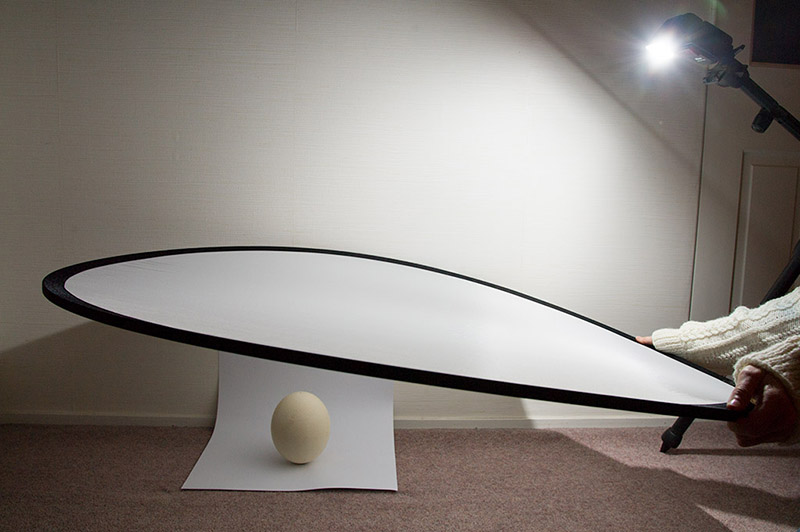
To illustrate this I set up an ostrich egg and photographed it using direct flash and then through a diffusion panel to show the dramatic difference in quality of light. The flash is the equivalent of the sun and the diffusion panel acts like a layer of cloud.
In this first setup you can see the flash set up as a small light source and the egg image shows the bright highlight on the egg and sharply defined dark shadow. Light is coming from one direction only. The surface of the egg is either illuminated or not with a sharp demarcation between the two. This creates a high contrast ratio with a big difference between the brightest and darkest areas. Detail can be lost in the brightest areas and the darkest areas. This is not as clear on the bottom of the egg as some light is bouncing up from the light paper acting as a fill light. This can occur in nature when photographing in bright sun over snow when the light reflecting up off the snow acts as a good fill light to reduce the harshness of the sun.
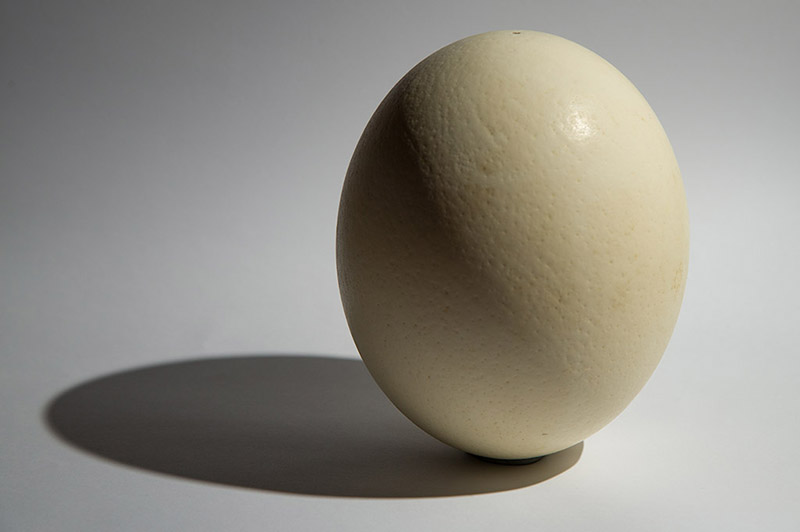
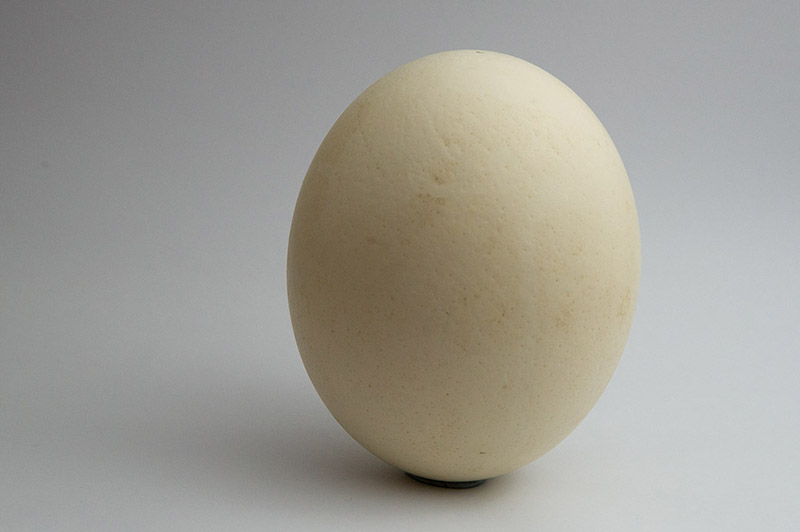
In the second setup all that has changed is the introduction of a diffusion panel just above the egg. This functions as a layer of cloud would and creates a much larger light source which throws light onto the egg from a broad range of directions. As a result the egg is more evenly illuminated with no sharp demarcation on the surface or in the shadow. The effect is a low contrast ratio with less difference between the brightest and darkest areas so detail is recorded in all areas.
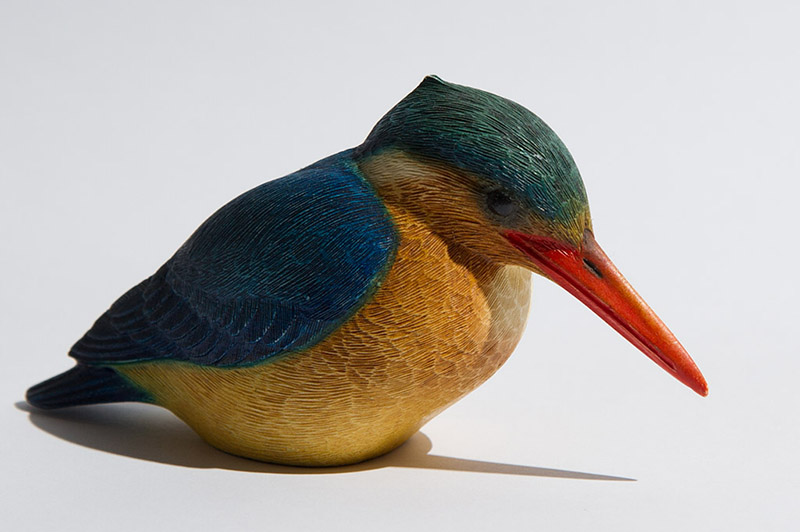
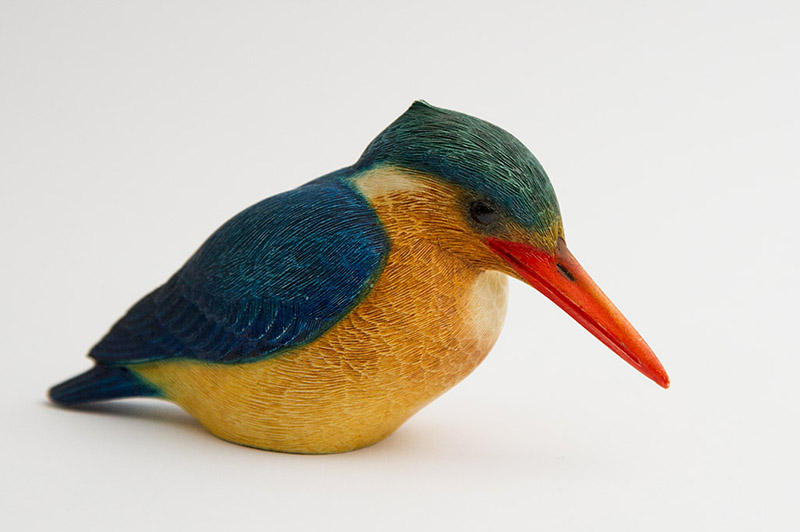
In this next set I added a small model of a kingfisher to show the effect of the different types of light.
An upcoming post on photographing penguins will again highlight the beauty of diffuse light from cloud cover.

Pingback: Wingspan National Bird of Prey Centre
Pingback: Cheap DIY Macro Flash Diffuser