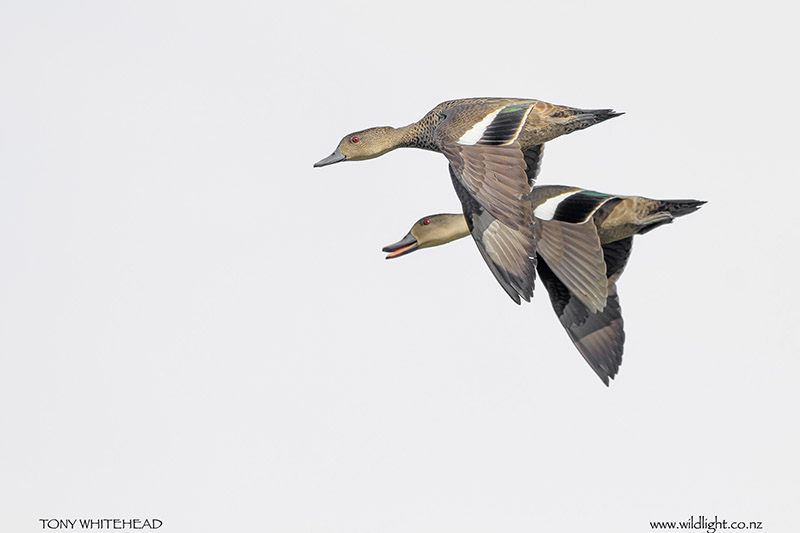
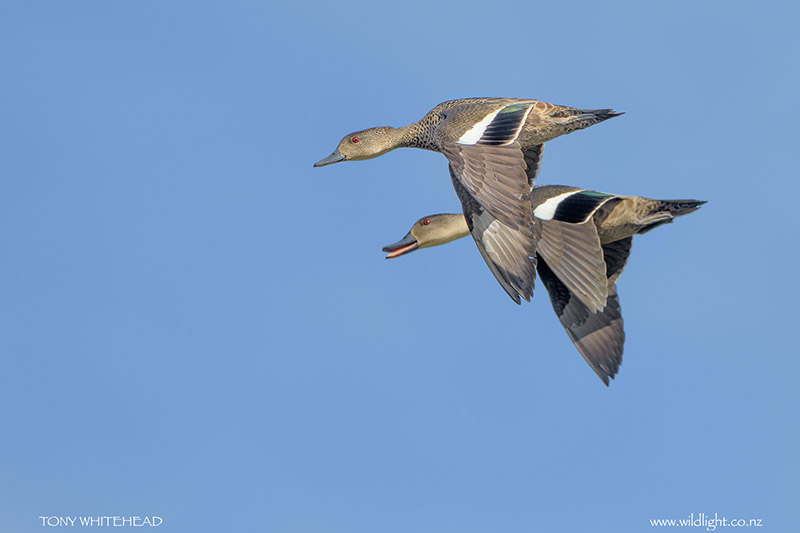
In last week’s post I wrote about the Clone Stamp tool in Lighten mode for cleaning up High Key bird images. This week’s post was prompted by an image I got of a pair of Grey Teal in flight against a clean blue sky which is not a typical situation for creating a high key bird image. Normally I look for a uniform grey sky that I can push to white by “overexposing” in camera with manual exposure set correctly for the bird.
I often find the HSL panel (Hue, Saturation, Luminance) in the Lightroom Develop module useful for adjusting specific colours and in this case processed 2 versions of the photo. The first with the blue sky darkened slightly by reducing the luminance of the blues and slightly desaturating them. I then tried a version desaturating them completely and and pushing the luminance to +100. This quickly and cleanly achieved an almost white, uniform background. This can be pushed to a pure white with a levels adjustment layer masked to the background alone but for the purposes of illustration I have left it the very light grey that came out of Lightroom.
This technique works best if there are no blues on the subject and if the background is clean and uniform. It is quick and easy to try and assess the result and if it works for the image is a big step toward the final result.
I use Lightroom for my RAW processing but the same effect is available through Adobe Camera Raw if you prefer to work from Bridge to Photoshop.
Photo with Nikon D500 and Nikon 500m F4VR lens.

